Savin Copier SDC326 Manuale Utente
Navigare online o scaricare Manuale Utente per Fotocopiatrice Savin Copier SDC326. Savin Copier SDC326 User's Manual Manuale Utente
- Pagina / 112
- Indice
- SEGNALIBRI
- SDC326/A Copy Reference 1
- Safety Information 5
- R CAUTION: 6
- How to Read This Manual 7
- TABLE OF CONTENTS 8
- 3.Adjustment and Color Memory 9
- 4.Area Editing (Option) 10
- 7.Others 11
- 8.Specification 11
- Tlcx301n.eps 12
- Guide To Components 14
- Bypass tray 15
- Ventilation holes 15
- Zcmp010e.eps 16
- Using the Touch Panel Display 18
- Entering Numbers 19
- Color Sample Chart 20
- 1. Basics 21
- Starting the Machine 22
- Turning On the Power 23
- Originals 24
- Trsr010e.eps 26
- Tcar060e.eps 28
- Tcar070e.eps 30
- Limitation 32
- Large Original 34
- 2. Copying 35
- Adjusting Copy Image Density 36
- Basic Procedure 37
- Selecting a Color Mode 38
- Basic color 40
- User colors 40
- Twin Color (Color Copy) 42
- Text mode 44
- Photo mode 44
- Selecting the Copy Paper Size 46
- GCBYPA1E 48
- Gchyoh1e.eps 50
- Making A3, 11" × 54
- × 17" full bleed copies 54
- GCMRYO1E 56
- GCMRYO3E 56
- Auto Reduce/Enlarge 58
- Interrupt copying 60
- Recalling your settings 62
- GCTHEN1E 64
- Enlarging 66
- GCZOOM1E 67
- Using the number keys 68
- GCDHEN1E 69
- GCDHEN2E 70
- Duplex—Making 2 Sided Copies 73
- 2 Sided → 76
- → 2 Sided 76
- Series Copies 80
- GCSEPR2E 82
- Combine 2 Originals 83
- Combine 4 Originals 85
- Shifting the Image 86
- GCTOJS1E 87
- • Back: 0mm Right 88
- • Back: 0" Right 88
- Cover Sheet 89
- GCHYOS1E 89
- GCHYOS3E 90
- Color Creation 93
- Color Background 96
- GCMILL1E 98
- GCMILL2E 98
- Image Creation 99
- GCHATN1E 99
- GCSORT1E 100
- Finishing 101
- GCSORT2E 102
- GCSORT3E 103
- Reference 104
- Combination Chart 107
- *1 *1 *1 *1 108
Sommario
Operating InstructionsSDC326/A Copy Reference ZCMH011 E.epsRead this manual carefully before you use this product and keep it handy for futurereferenc
vii4.Area Editing (Option)What is Area Editing? ... 117How to Edit Areas...
Copying902FinishingNote❒ To avoid problems caused by curled copies, try turning over the paper stackin the paper tray. If there is no improvement, cha
Finishing912Note❒ It is recommended to set originals in the document feeder with this function.❒ For sorting, the following limitations apply:❒ When y
Copying922StackThe optional 20-bin sorter stapler, 10-bin sorter or 3-bin sorter is required to use thisfunction.All copies of each original are deliv
Finishing932APress the [Stack] key.BSet your originals in the document feeder.CPress the {{{{Start}}}} key.StapleThe optional 20-bin sorter, 10-bin so
Copying942❒ The relationship between the orientation in which the original is set and thestapling position is shown below.❒ For stapling, the followin
Finishing952Changing the staple positionIf your machine is equipped with the 20-bin sorter stapler, you can select one oftwo stapling positions by cha
Copying962CPress the {{{{Start}}}} key.Stapling copies manually after copyingAAfter Sort mode copying is completed, press the key.copy57na.tifcopy57
Combination Chart972Combination Chart✩ Those modes can be used together.★ Those modes can be used together with some limitations.→ The original mode i
Copying982Paper SelectionAuto Paper Select ✩✩×××× ✩ ×××××××××××× ✩✩✩✩✩-- →→→→→→→→→→→→→→→→→→→→→→→→→→→→→→→→→→→→→→→→×××× ✩✩✩✩Copying from Paper Trays✩✩✩✩
Combination Chart992Shift/BookMargin Adjustment ✩✩✩✩✩✩✩✩✩✩✩✩✩✩✩✩✩✩✩✩✩✩✩×××× ✩✩✩✩Centering/Cornering ✩✩✩✩✩✩✩✩✩✩✩✩×××× ✩✩✩✩✩✩✩✩✩✩✩✩✩✩✩Cover Sheet ✩✩✩✩✩✩
viii6.Changing the Machine's SettingsChanging Paper Size... 169Changin
Copying1002Newly Selected ModeColor ConversionColor EraseColor BackgroundMirror ImagePositive/NegativePreset Reduce/EnlargeZoomDirectional Magnificati
Combination Chart1012Color CreationColor Conversion -- ✩✩✩★✩✩✩✩✩✩✩✩✩✩✩✩✩✩✩✩✩✩✩✩✩Color Erase ✩ -- ✩✩★✩✩✩✩✩✩✩✩✩✩✩✩✩✩✩✩✩✩✩✩✩Color Background ✩✩-- ✩★✩✩✩✩✩
Copying1022
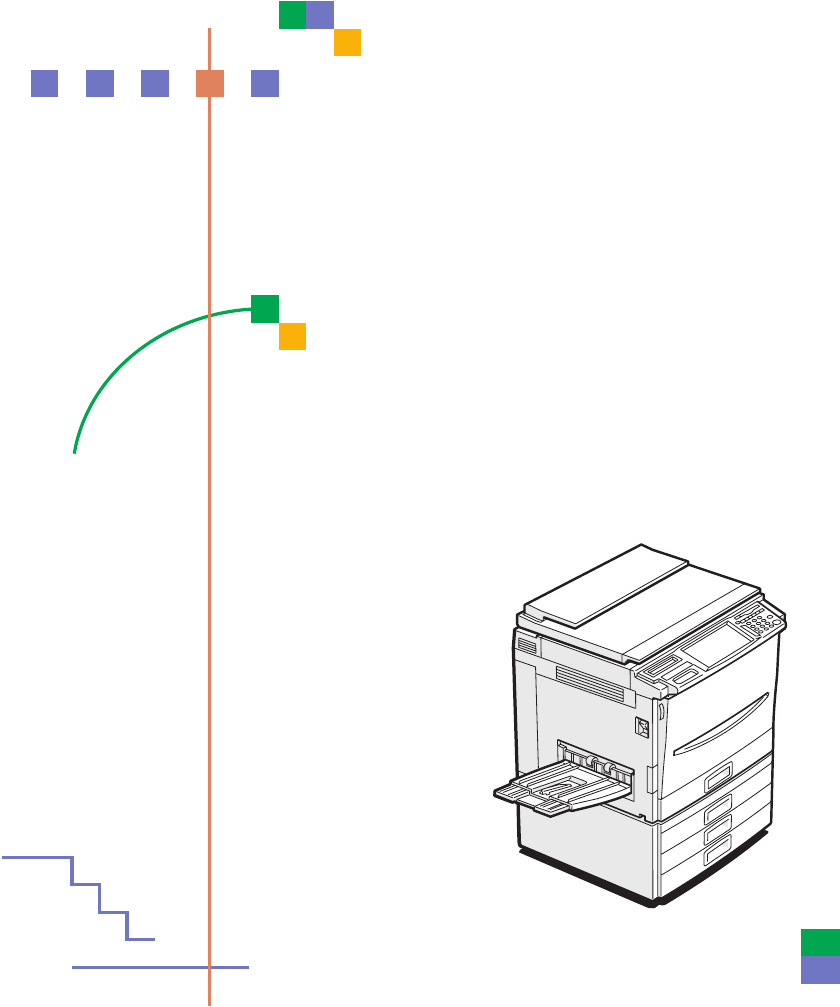
2What You Can Do with This MachineTlcx301n.eps
4Guide To Components1.Platen cover (option)Lower this cover over originals placed onthe exposure glass for copying.2.Main power switchTo start the mac
51.Bypass trayUse to copy onto OHP transparencies,adhesive labels, translucent paper, postcards, and custom size paper, ⇒ P.37“Copying from the Bypass
6OptionsThis machine can be provided with the following options:1.Platen coverLower this cover over originals placed onthe exposure glass for copying.
7Operation Panel1.Touch panel displayYou can see the operation status andmessages here.2.Screen Contrast knobYou can change the brightness of the dis-
8Using the Touch Panel DisplaySelecting FunctionsOn the touch panel display, you can find keys, instructions and messages. Bypressing keys on the disp
9Entering NumbersWhen the display prompts you to enter a number, type in the number with thenumber keys and press the [#] key on the display to accept
IntroductionThis manual contains detailed instructions on the operation and maintenance of this machine. To getmaximum versatility from this machine a
10Color Sample ChartThis is the User Color sample. You can mix the basic colors to make your owncolors (User Color).Note❒ The color sample might diffe
111. BasicsTurning On the PowerTo start the machine, press the operation switch to turn the power on.Note❒ This machine automatically enters Energy Sa
Basics121Starting the MachineAPress the operation switch to make the On indicator go on.Note❒ If the power is not turned on when the operation switch
Turning On the Power131Shutting down the machineAPress the operation switch to make the On indicator go off.Turning off the main powerATurn off the ma
Basics141OriginalsStandard Size OriginalsThe machine will detect originals of the following sizes and directions as stan-dard size originals:❖❖❖❖ When
Originals151• OHP transparencies• Translucent paper• Pasted originals• Damp originals• Sticky originals• Wavy originals• Originals that are not made f
Basics161Setting Originals on the Exposure GlassALift the platen cover or the document feeder.BSet the original face down on the exposure glass. The o
Setting a Stack of Originals in the Document Feeder171Setting a Stack of Originals in the Document FeederYou can insert a stack of originals into the
Basics181DSet the originals face up into the document feeder until the Insert Originalindicator goes off.1.Limit mark2.Original guideNote❒ The last pa
Setting one Original at a Time in the Document Feeder191Setting one Original at a Time in the Document FeederIf you set one original at a time in the
Note to users in the United States of AmericaNotice:This equipment has been tested and found to comply with the limits for a Class B digital device, p
Basics201FWhile the Auto Feed indicator is lit after an original is fed, set the next orig-inal. The original is automatically fed and copied.Note❒ Yo
Setting Originals of Different Sizes in the Document Feeder211Setting Originals of Different Sizes in the Document FeederPreparationTo use this functi
Basics221Setting Custom Sized OriginalsWhen copying from custom sized originals, specify the size of the originals sothat copies are well aligned.Limi
Setting Custom Sized Originals231DPress the [Orig. Vert.] key and enter the vertical size with the number keys,then press the [#] key.EPress the [OK]
Basics241Removing the Platen Cover to Copy a Large OriginalYou can remove the platen cover to copy a large (more than A3, 11" × 17") orig-in
252. CopyingBasic ProcedureASet your original on the exposure glass or in the document feeder. ⇒⇒⇒⇒ P.28“Full color copy mode”, ⇒⇒⇒⇒ P.33 “Auto Text/P
Copying262DPress the {{{{Start}}}} key.Note❒ To stop the machine during a multi-copy run, press the {Clear/Stop} key.❒ If you want to change the setti
Basic Procedure272Manual image densityIf you require darker or lighter copies, adjust the image density yourself.AIf [Auto Image Density] key is selec
Copying282Selecting a Color ModeSelect a color mode that best suits your originals and copying requirements.Auto color select modeThe machine automati
Basic Procedure292AMake sure that the [Full Color] key is selected.BSet your originals, then press the {{{{Start}}}} key.Black & White copy modeTh
iNoticeDo not make copies of any item for which copying is prohibited by law.Copying the following items is normally prohibited by local law:Bank bill
Copying302Basic colorAPress the [Single Color] key.BSelect the color.Note❒ You can select the color density level.CPress the [OK] key.DSet your origin
Basic Procedure312CSelect the color.Note❒ You can select the color density level.DPress the [OK] key.ESet your originals, then press the {{{{Start}}}}
Copying322Twin Color (Color Copy)APress the [Twin Color] key.BSelect the color you want to copy the color parts of the original in.CIf you wish to cop
Basic Procedure332BPress the [Red & Black Color] key, then press the [OK] key.CSet your originals, then press the {{{{Start}}}} key.Selecting the
Copying342AMake sure that the [Auto Text / Photo] key is selected.BSelect the photo mode.CSet your originals, then press the {{{{Start}}}} key.Text mo
Basic Procedure352Note❒ There are 3 types of Photo mode:• [Press Print]:Use when copying photographs or pictures that are printed on paper (e.g.magaz
Copying362Selecting the Copy Paper SizeSelect a suitable size of copy paper based on the original size and the reproduc-tion ratio.Auto paper selectTh
Basic Procedure372----Image RotationIf the direction in which your original is set (landscape or portrait) is differentfrom the paper you are copying
Copying382❒ Select one of the following settings or keys:• [Normal]: normal paper• [Thick]: thick paper, post cards, adhesive labels, translucent pape
Basic Procedure392❒ When you copy onto OHP transparencies, you can select whether a blank slipsheet is inserted between OHP transparencies.❒ When you
iiSafety InformationWhen using your equipment, the following safety precautions should always befollowed.Safety During OperationIn this manual, the fo
Copying402BPress the [Normal], [Thick] or [OHP] key.Note❒ Make sure that the [Standard Size] key is selected.❒ When you copy onto OHP transparencies,
Basic Procedure412EAdjust the paper guides to the paper size.1.Horizontal size2.Vertical size3.Extender4.Paper guidesNote❒ Make sure the paper size an
Copying422DPress the [Custom Size] key.ESelect [Custom 1], [Custom 2], [Custom 3] or [Enter Size] keys.Note❒ If you selected [Custom 1], [Custom 2] or
Basic Procedure432GEnter the vertical paper size with the number keys, then press the [#] key.HPress the [OK] key.IAdjust the paper guides to the pape
Copying442Making A3, 11" ×××× 17" full bleed copiesBy sliding the paper guides of the bypass tray to greater than A3 (11") size, A311&q
Basic Procedure452APull up the tab.BLeaving the tab up, slide the paper guides until they stop.Note❒ Make sure that the paper guides match the paper s
Copying462Copying onto the reverse side of paperYou can copy onto the reverse side of paper that has been already copied onto.Note❒ If you wish to cop
Basic Procedure472❒ If Duplex copying cannot be done because of paper problems, set paper onthe bypass tray to copy on the front side, and once again
Copying482Auto Reduce/EnlargeThe machine can select the proper reproduction ratio based on the selected pa-per size and the original size.Note❒ Regard
Basic Procedure492Energy Saver ModeIf you do not operate the machine for a certain period after copying or press the{Energy Saver} key, the display go
iiiR CAUTION: • Protect the equipment from dampness or wet weather, such as rain, snow, and so on.• Unplug the power cord from the wall outlet before
Copying502Interrupt copyingUse the {Interrupt} key to interrupt a copy run and make urgently needed copies.ReferenceRegarding functions that cannot be
Basic Procedure512Auto StartIf you press the {Start} key during the warm-up period, the {Start} key will blinkand the machine will start copying after
Copying522CPress the [Program] key.DSelect the program number you want to store the settings in.Note❒ If this program number is already being used, th
Basic Procedure532BPress the [Recall] key.CSelect the program number you want to recall. The stored settings are dis-played.Note❒ Only programs with m
Copying542CounterBy pressing the {Counter} key, you can check the total number of copies made.Preset R/EReferenceRegarding functions that cannot be us
Basic Procedure552ReducingAPress the [Reduce/Enlarge] key.BMake sure that the [Preset R/E / Zoom] key is selected.CSelect the ratio you require.DSet y
Copying562EnlargingAPress the [Reduce/Enlarge] key.BMake sure that the [Preset R/E / Zoom] key is selected.CSelect the ratio you require.DSet your ori
Basic Procedure572ZoomYou can change the reproduction ratio from 25% to 400% in 1% steps.Note❒ You can select a ratio regardless of the size of an ori
Copying582CAdjust the reproduction ratio with the [+] or [-] key.DSet your originals, then press the {{{{Start}}}} key.Using the number keysAPress the
Basic Procedure592Directional Magnification (%)1.Horizontal %2.Vertical %Copies can be reduced or enlarged at different reproduction ratios horizontal
ivHow to Read This ManualSymbolsIn this manual, the following symbols are used:R WARNING:This symbol indicates a potentially hazardous situation that
Copying602EEnter the vertical ratio with the number keys, then press the [#] key.FSet your originals, then press the {{{{Start}}}} key.Directional Siz
Basic Procedure612APress the [Reduce/Enlarge] key.BPress the [Directional Mag.] key.CPress the [D. Size Mag.(mm)] key.DEnter the horizontal original s
Copying622FEnter the vertical original size with the number keys, then press the [#] key.GEnter the vertical copy paper size with the number keys, the
Duplex—Making 2 Sided Copies632Duplex—Making 2 Sided Copies1 Sided →→→→ 2 SidedThis function makes double sided copies from single sided originals.Lim
Copying642Note❒ The image on the backside of copies is shifted by just the binding margin.❒ You can change the width and position of the binding margi
Duplex—Making 2 Sided Copies652BPress the [1 Sided→→→→2 Sided] key.CPress the [Even] key or the [Odd] key according to the number of your origi-nals.N
Copying6622 Sided →→→→ 2 SidedThis function makes double sided copies from double sided originals.APress the [Duplex/Combine] key.BPress the [2 Sided→
Duplex—Making 2 Sided Copies672Book →→→→ 2 SidedUse this feature to copy facing pages of a book or magazine onto both sides ofthe copy paper.Note❒ Sel
Copying682BSelect the lengthwise KKKK copy paper.CPress the [Book→→→→2 Sided] key.DSet your original on the exposure glass, then press the {{{{Start}}
Duplex—Making 2 Sided Copies692• Inch versionAPress the [Duplex/Combine] key.BSelect lengthwise KKKK copy paper.CPress the [Multi→→→→2 Sided] key.DSet
vTABLE OF CONTENTSWhat You Can Do with This Machine ... 2Guide To Components...
Copying702Series CopiesBook →→→→ 1 SidedThis function makes one-sided copies from two facing pages of bound (book)originals.ReferenceRegarding functio
Series Copies712APress the [Duplex/Combine] key.BSelect lengthwise KKKK copy paper.CPress the [Book→→→→1 Sided] key.DSet your originals, then press th
Copying7222 Sided →→→→ 1 SidedThe optional document feeder is required to use this function.ReferenceRegarding functions that cannot be used together
Combine732CombineCombine 2 OriginalsThe optional document feeder is required to use this function.This function automatically combines two single side
Copying742APress the [Duplex/Combine] key.BSelect widthwise LLLL copy paper.CPress the [Combine 2 originals] key.DSet your originals in the document f
Combine752Combine 4 OriginalsReferenceRegarding functions that cannot be used together with this function, ⇒ P.97“Combination Chart”.APress the [Duple
Copying762Shifting the ImageShiftYou can move the image to a corner or edge as well as center it. This function isuseful when the copy paper is larger
Shifting the Image772CSelect the direction in which you want to shift the image.Note❒ When you want to center the image, press the [Center] key.DPress
Copying782❒ The margin width default is as follows. You can change this default settingwith the user tools. ⇒ P.179 “General Features”.❒ If you set to
Cover Sheet792Cover SheetFront CoverThe optional document feeder is required to use this function.Note❒ The cover sheets should be identical in size a
viZoom... 57Directional Magnification (%) ...
Copying802When you use Front Cover mode with 2 Sided →→→→ 1 Sided or 2 Sided →→→→ 2 Sided modeAEnter 2 Sided→→→→1 Sided or 2 Sided→→→→2 Sided mode. ⇒⇒
Cover Sheet812❖❖❖❖ Back Cover: BlankNote❒ You can specify whether to copy onto the back cover sheet. If you select[Copy], the last pages will be copie
Copying822When you use Front & Back Covers mode with 2 Sided →→→→ 1 Sided or 2 Sided →→→→ 2 Sided modeAEnter 2 Sided→→→→1 Sided or 2 Sided→→→→2 Si
Color Creation832Color CreationColor ConversionThis function converts selected colors of an original into different colors on thecopy.Note❒ Up to 4 co
Copying842BPress the [Color Conversion] key.CSelect the original color (color to be converted).DSelect the new color (color to convert to).EIf you wan
Color Creation852Color EraseThis function erases selected colors from the original image.Note❒ Up to 4 colors can be erased at one time.❒ Colors that
Copying862CSelect the color to be erased.DPress the [OK] keyESet your originals, then press the {{{{Start}}}} key.Color BackgroundThis function makes
Color Creation872BPress the [Color Background] key.CSelect the color for the background.Note❒ You can select the color density level.DPress the [OK] k
Copying882Image CreationMirrorThis function makes a mirror image copy of the original.Note❒ If set the original as below when setting on the exposure
Image Creation892Positive/NegativeThis function copies the original image in complementary colors. If you use ablack and white original, black and whi
Più documenti per Fotocopiatrice Savin Copier SDC326


Prodotti e manuali riguardandi Fotocopiatrice Savin Copier SDC326
 (42 pagine)
(137 pagine)
(167 pagine)
(67 pagine)
(49 pagine)
(6 pagine)
(42 pagine)
(137 pagine)
(167 pagine)
(67 pagine)
(49 pagine)
(6 pagine)


 (71 pagine) (74 pagine)
(8 pagine)
(71 pagine) (74 pagine)
(8 pagine)
© 2020, manymanuals.it. Tutti i diritti riservati | 0.070 s |
 Manymanuals.com
 Manymanuals.de
 Manymanuals.fr
 Manymanuals.it
 Manymanuals.pl
 Manymanuals.cz
 Manymanuals.es
 Manymanuals-pt.com
Commenti su questo manuale